Knowledge Base

We’re here to help. Find the answers to all your questions on managing your account on Ezovion Appointments

1 |   Edit Profile

  1. First of all, login to the Doctor Dashboard.
  2. After you have logged in you will see your email in the top-left corner, click on it.
  3. You will see a dropdown. Click on “My Profile”.
  4. You will then reach the page where you can easily edit your details.

2 |   Change Password

  1. First of all, login to the Doctor Dashboard.
  2. After you have logged in you will see your email in the top-left corner, click on it.
  3. You will see a dropdown. Click on “My Profile”.
  4. You will then see “Change Password” button on the bottom-left. Click on that button to change your password.
  5. You will then be prompted to change your password.
  6. After you set the new password, click on “Change Password” and you password will be changed.

3 |   Set Working Hours

  1. First of all, login to the Doctor Dashboard.
  2. After you have logged in you will see your email in the top-left corner, click on it.
  3. You will see a dropdown. Click on “My Profile”.
  4. You will then see “Working Hours” tab, click on it.
  5. After clicking on the “Working Hours” tab you can configure your appointment timings as per your choice.
  6. Once you set your timings, just click “Save” button and you’re done.
  7. Lastly, click on the “Save Changes” button on the bottom-right corner and you’re done.

4 |   Set Days Off

  1. First of all, login to the Doctor Dashboard.
  2. After you have logged in you will see your email in the top-left corner, click on it.
  3. You will see a dropdown. Click on “My Profile”.
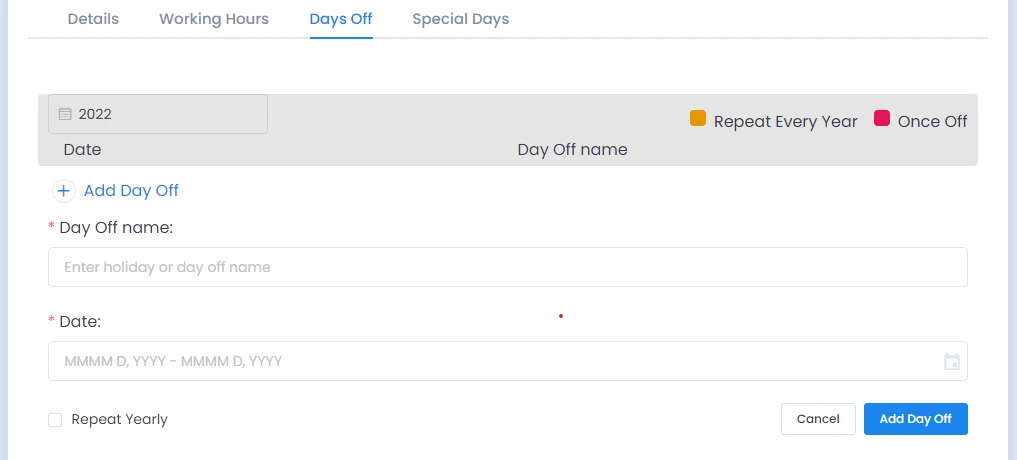
  4. You will then see “Days Off” tab, click on it.
  5. After clicking on the “Days Off” tab you can configure your days off as per your choice.
  6. Once you set your days off, click “Add Day Off” button and you’re done.
  7. Lastly, click on the “Save Changes” button on the bottom-right corner and you’re done.

5 |   Set Festivals / Special Days

  1. First of all, login to the Doctor Dashboard.
  2. After you have logged in you will see your email in the top-left corner, click on it.
  3. You will see a dropdown. Click on “My Profile”.
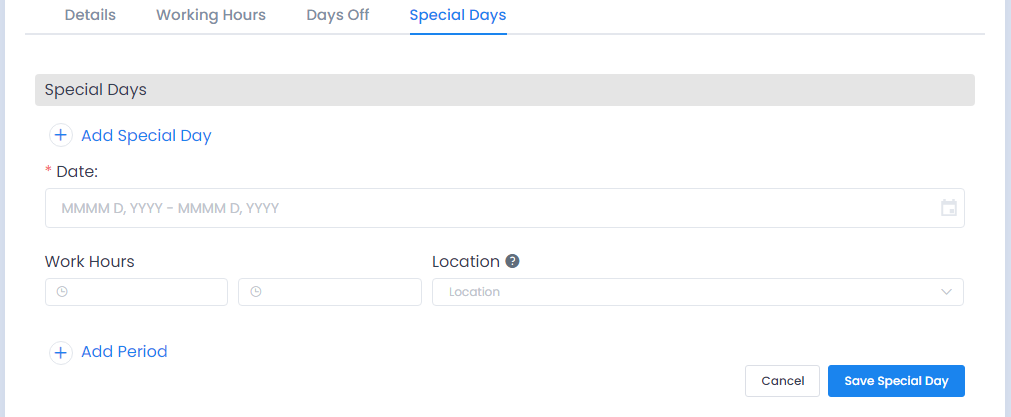
  4. You will then see “Special Days” tab, click on it.
  5. After clicking on the “Special Days” tab you can configure your special days as per your choice.
  6. Once you set your special days, just click “Save Special Day” button and you’re done.
  7. Lastly, click on the “Save Changes” button on the bottom-right corner and you’re done.

6 |   Setup Google Meet

  1. First of all, login to the Doctor Dashboard.
  2. After you have logged in you will see your email in the top-left corner, click on it.
  3. You will see a dropdown. Click on “My Profile”.
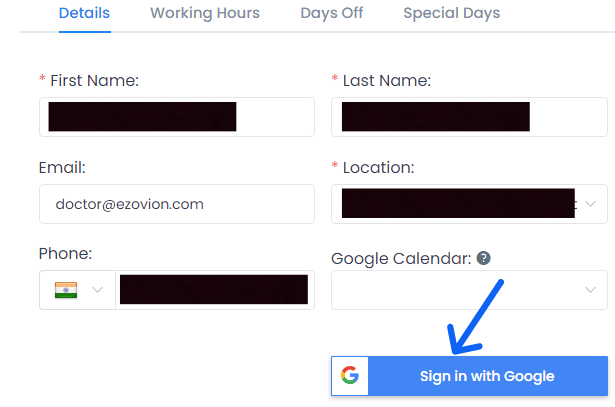
  4. Now you will see a “Sign in with Google” button at the bottom-right corner.
  5. After clicking on that button you will be prompted to choose your Google account. Please choose your Google account from there.
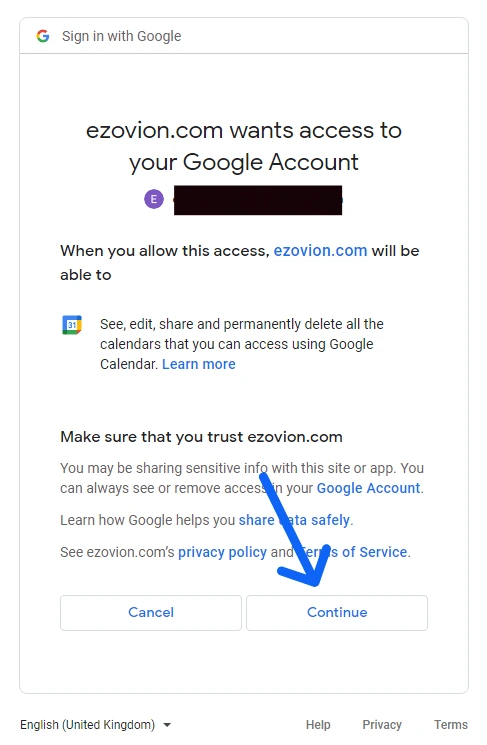
  6. After you have selected your account you will then be redirected to a new page. Please click “Continue” on that page.
  7. After clicking “Continue” your Google account will be linked and now whenever anyone books an appointment with you, a Google Meet link will be created automatically and it will be shared to your email and to the email of the person who booked an appointment with you.